Help:Creating GIFs
Creating a GIF with EZGIF from images files
GIF files are often used on the wiki to show another state of a certain furni – such as EZGIF – allow you to create your animated GIF files by combining separate images of one of the following formats: GIF, JPG, PNG.
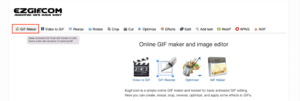
- First step – visit the website of EZGIF: https://ezgif.com. Then, click “GIF Maker” in the toolbar.

Choosing your files

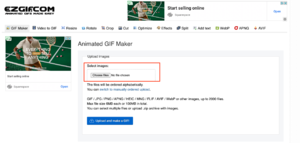
To begin with, pick the images you want to use as frames for your GIF. Once you have chosen them, press the button “Choose Files”. For a good result, we advise you to pick at least three images. Then, click “Upload and make a GIF!”.
Once done, if all the images you had selected are not the same size, a message will appear to correct that. Click “Resize”.
Designing the GIF

Next step is to design your GIF. Several tools are available, as there is much flexibility in what you can do. Your images can be similar and tell a story like in stop motion videos.
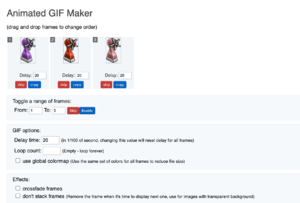
First, you can rearrange the order of the images, as they have been sorted in alphabetical order. All you have to do is to drag and drop them. Then, “Delay time” refers to the speed of the whole GIF. The larger the value you choose, the slower the animation will appear. You can select a different length of times each image appears for in the GIF by toggling individual screens. You can also decide to repeat the sequence of images by adding a unity in the “Loop count” input line. When left blank, the loop is endless. In terms of effects, you can select “crossfade frame” if you want smooth and fading transitions between your images, or “don’t stack frames” if you prefer to remove the current frame when the next one is to be displayed.
Once all the parameters are checked, click “Make a GIF!”.
| Editing Help | |
|---|---|
| Formatting | Tables · Editing Conventions · Formatting · Grammar · Visual Editor |
| Media | Galleries · Creating GIFs · File Conventions · Images |
| Navigation | Navigation · Categorising · Creating A Category · Links and References · Namespace |
| Page Guides | Habbo Events · Fansites · Habbox Staff · Pets · Rares and Furni Items · Room Bundles · Sulake Staff · Furni Ranges and Campaigns Upcoming and unreleased |
| MediaWiki | Habbox Wiki Handbook · Habbox Wiki Group Rights · MediaWiki Help Contents |